It's a G-g-ghhhhooooosssstt!!!

My daughter wanted to go with something authentically Halloween this year. So spooky ghost it is.

Prepare hat with white paint as needed so as not to show through fabric. Curve wire both horizontally and vertically above the hat’s brim. Curve the wire around vertical wire so it stay put. Create hooks on the end of the wires, attach them at the midpoints, and sew them in place. Paint wire white so it’s not as easily seen underneath the fabric.

Place the gauze cloth over the hat at the midway point. Sew in place over the button of the hat to lock in.

Fill the empty space beneath the wire with scrap filling using either paper or stuffing. Bind this with masking tape.

Liquid starch consistency should be thick.

Create liquid starch by boiling water with flour. Mix flour in thoroughly. I used about a 2:1 flour to water ratio, but the main idea is that you want it to have a thick consistency.

Rip scraps of paper into long strips. Dip into liquid starch mixture, and lay on top of form all around the hat brim. Wait to dry or take hairdryer to quicken the process before proceeding.

Cover in white paint.

Painting liquid starch over ghost form.

Cut out eye holes.

With black felt, cut curved triangles for the tops of the eyes. Attach with felt glue or sewing.

Fold black tulle over repeatedly. I had about 5-6 layers. Pin the squares in place over the eye holes. Attach via sewing and cut scrap edge.

  1. Cut black felt triangle for the nose. Mold to the starched folds, and attach via felt glue or sewing.

  2. Cut jagged triangles for the teeth of an open mouthed ghost. Attach via felt glue or sewing.

Put your kid in their natural habitat to go do their spooky thang.

Piñata for the Pint-sized

Homemade piñata was a happy byproduct of a fun mess with the kids; getting crafty with recyclables. Win-Win!

Project planning with a draft sketch a la my 5 year old.

Outlining the shape (coloring in the lines).

Cut it out.

Use this as a guide for the second shape of the form.

Toilet paper rolls, unrolled

These end up being the perfect width for the structure. Cut along the seam of the rolls to unravel them.

Masking tape the rolls to the shapes. Then, tape both sides together to make the form.

Structure is ready for paper mâché reinforcement.

Liquid Starch

Boil water, add 1:1 water and flour until congealed into a thick mixture.

Cut/rip paper strips to dip into the starch mixture. Reminder that if it’s too wet, the structure may collapse and/or have a ridiculously long drying time. Once you dip the strips, squeegee the strip with your fingers to remove excess starch, lay around the form like a bandage, wrap it all over.

Almost there… paper mâché dried, and ready for paint.

Painting Assist

More messy fun! We used acrylic for this final step.

Final product. Cut a door at the top for candy install, and string fishing line through the top. (I reinforced the holding point with some hot glue.)

Let it Swing! Batter’s up!

Little Miss Mermaid

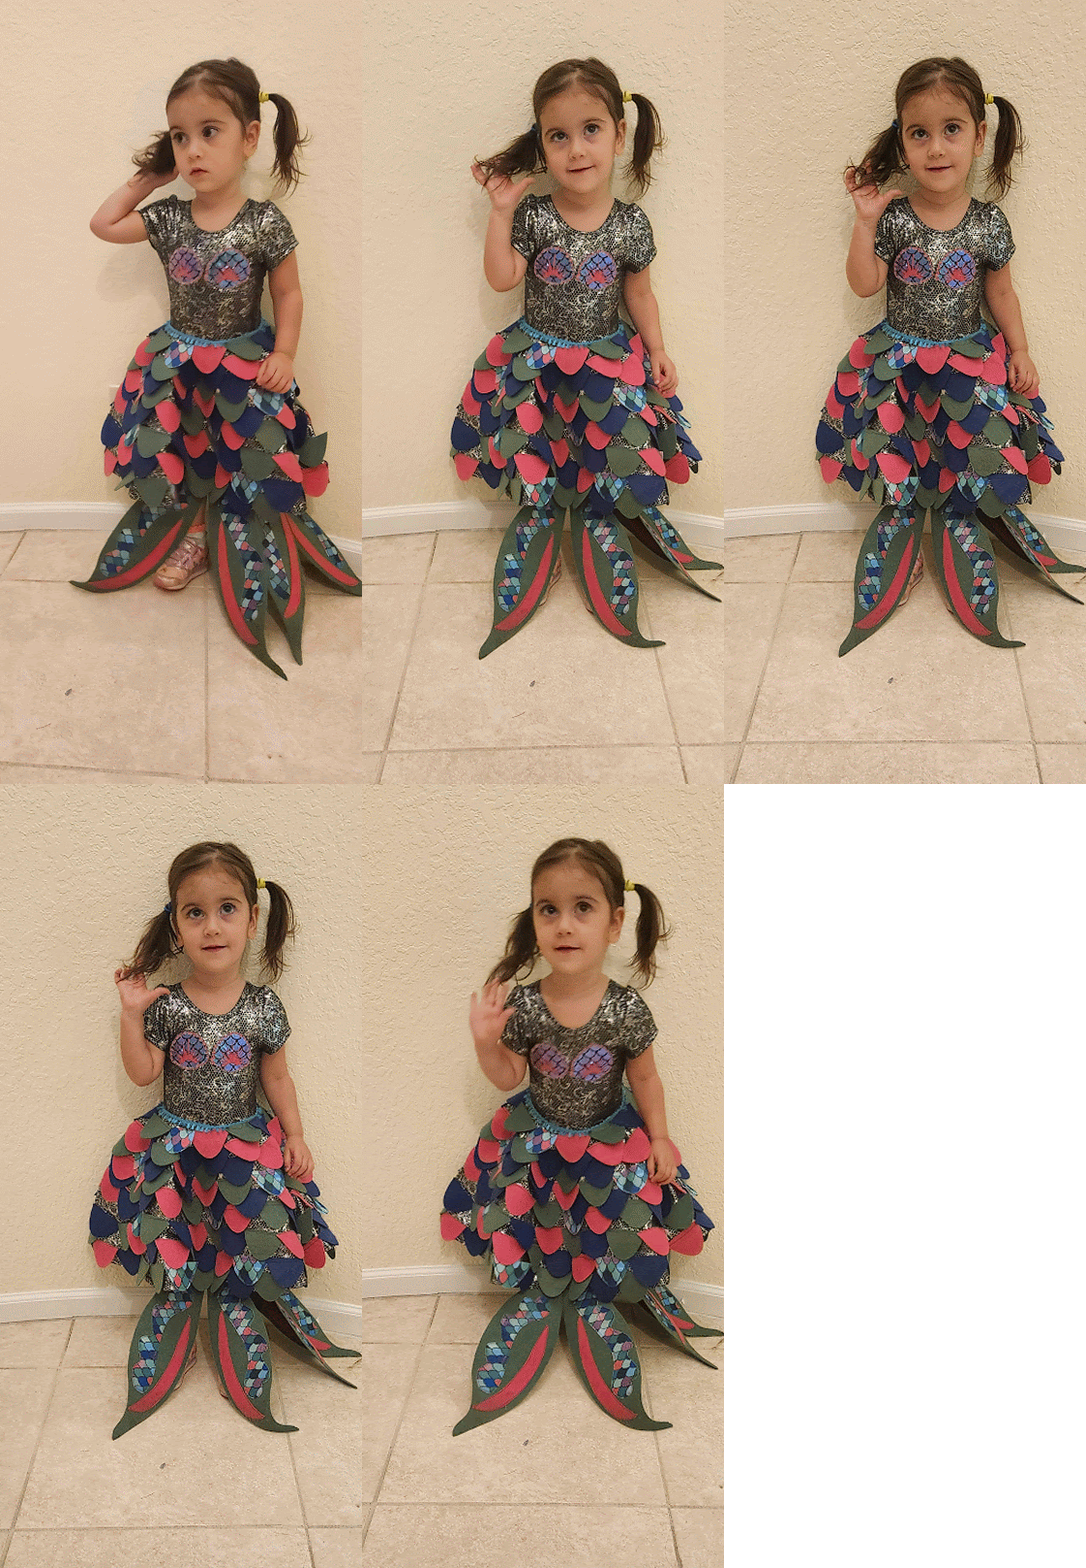
Ariel has been the princess of choice recently for our littlest (and honestly, there is no other choice.) It was also the first time requesting piggies which I really hope will continue.

Supplies needed:

  • base dress

  • Stiff felt in mermaid themed colors

  • Optional fabric with special patterning for the shell top

girl toddler spin pigtail homemade mermaid costume

Creating a base for this from scratch was out of the question for me right now, but I am certainly not above repurposing! Found this mermaidy gem after a quick stop into my local ‘Once Upon a Child’. I was initially searching for something more aquatic, but the patterning on this one felt perfectly scaly to me. Let’s make it happen!

metallic black shiny hexagonal pattern dress

Using a semi-circle, the scale scaled to 2”x3” and cut out on stiff felt (using your personal mermaid color patterning preferences) on the Cricut, or by creating a template and cutting.

Video Block
Double-click here to add a video by URL or embed code. Learn more

elderly dog mettalic black dress scales pin placement

Pin the scales spiraling down the skirt, and sew to attach. Get emotional support for this tedium from your trusty pup.


Shell exterior was cut on the Cricut, but can easily be freehand. Mark your shape by laying the cut outs on the felt and draw the shell shape with a slight trim around the outside edge.

For the Shell interior, I cut the fabric (or use specially patterned felt) on the Cricut, and put the shape over a pop of color in stiff felt to make them extra fancy fun. Place the interior shape onto the felt with fabric glue, or sewn. Sew shells in proper placement on the bodice. (My favorite feature.)

mermaid shells top homemade

girl toddler swishing costume mermaid tail

Tail fin and embellishments templates were created freehand on oversized stiff felt to have enough for both front and back (because you can never have too much tail fin.) Our Little Mermaid definitely appreciated the extra swishability this provided.